Filing your flight plan with ATC.
As you have now discovered, creating a FlightPlan with EasyVFR is very simple and with little practise can be done in just minutes. The FlightPlan now reflects your intended trip, but now Air Traffic Control (ATC) needs to be informed.
No need to fill out the well-known ATC flight plan form anymore, or make a long phone call and have someone enter the plan for you - EasyVFR will now do the filing for you, in close cooperation with Rocket Route. Quick, secure, convenient!
CAUTION: Flight plans filed here will be submitted to the AFTN network. DO NOT submit a flight plan unless you intend to actually use it for a flight! As a rule for correct interpretation of the text below: "flight plan" indicates an ATC flight plan, "FlightPlan" indicates an EasyVFR intended route you created.
- Create or Load a FlightPlan in EasyVFR, and keep the FP tab open. You'll see (part of) the FlightPlan you're using on the lower part of the FP tab.
- Press the File FP button. If you have a Frequent Flyer Membership (FFM) with the PocketFMS Foundation you can proceed without further ado; if you do not, you'll need to purchase a (surprisingly affordable) "ATC Flight Plan Filing Subscription" which will allow you to file an unlimited number of flight plans in a one-year period. EasyVFR will prompt you for this if you do not have a FFM licence.
The screen will now show 3 options: File, Delay and Cancel a flight plan. The vertical red bar on the left hand side will close the screen filing without further action.
- Select the File button. A new screen will appear, allowing you to set a variety of flight plan values. A number of these options will already have been set, according to your FlightPlan.
- Carefully work your way top-down through the screen. If you're not unfamiliar with filing flight plans, you won't encounter many surprises on it. Many of the buttons shown are mutually exclusive; if you select one, another will automatically be deselected.
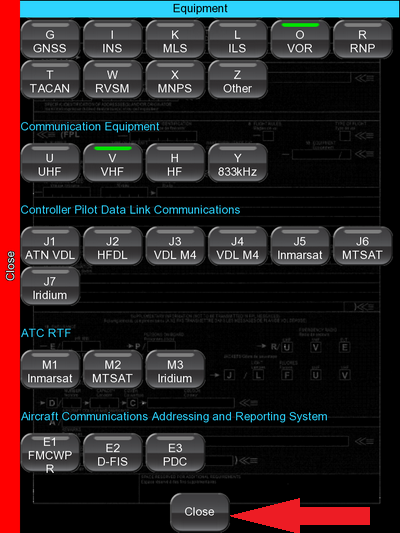
- Some of the buttons will lead to sub-screens, such as the Equip't (Equipment), Other Info and Dinghies buttons. These sub-screens will have a Close button all the way down the page, which will allow you to store the selected values and return to the calling screen.
 |
- Scrolling happily down the main "File a flight plan" screen you'll notice that EasyVFR has already filled out quite a few details in the flight plan, such as the departure, destination, time, planned speed etc. These values are based on the FlightPlan you created or loaded previously. Other values, such as the callsign, aircraft type and equipment settings will be stored as defaults for later, though you will of course be able to modify them later on.
- Notice that, scrolling down, you'll find a Route button. EasyVFR has converted your FlightPlan into coordinates and entered those here for you.
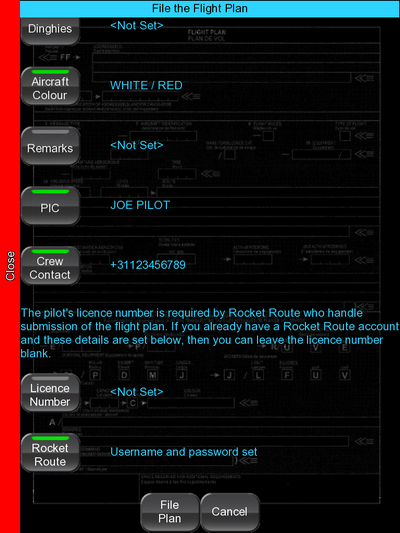
- At the bottom of the "File a flight plan" screen you can provide some credentials. The PIC (Pilot in Command) and Crew Contact values will be used for the flight plan, however, you can also enter a Licence Number and your Rocket Route details.
 |
- If you have your own Rocket Route account, you can enter your credentials here. EasyVFR will then file all your flight plans using your own account, allowing you to manage your flight plans with Rocket Route later on. If you leave these empty you'll be filing your flight plans via a general PocketFMS account. In that case you'll need to provide Rocket Route with your pilot's Licence Number.
- After pressing Rocket Route you can enter your credentials. When done, press Close.
- When satisfied that the details for the flight plan have all been filled out correctly, it's time to start filing! By pressing the File Plan button, we get started.
- You'll be asked to confirm this is really what you want to do. Again, please only proceed from this point if you actually wish to file the flight plan with ATC (you're actually going to fly this plan).
- When you opted to go ahead, EasyVFR will show that it's busy.
- After a few moments, EasyVFR will report that the plan was filed successfully. Your flight plan is activated; time to prep the airplane and get going!
- Sometimes sadly, logistics just do not cooperate and you need to adjust your plans. Using the File FP button (still on the FP tab) again and selecting either Delay or Cancel will allow your flight plan to catch up with a changed reality. The worst case scenario: we have to Cancel the flight plan. A list of our active flight plans is shown, each with a Select button besides it.
- Now confirm you really wish to cancel the flight plan with ATC by filing a cancellation message. Meanwhile, the primary details of the flight plan are also shown.
- After a few moments, the cancellation will be confirmed by EasyVFR. Time to shove the bird back in the hangar & grab a refreshment . .


